top of page

Basic Performance Mods

  • joepampel
  • Jul 17
  • 9 min read

Updated: 1 day ago


Cornering on the stock suspension. Might be time for bigger anti-roll bars! (photo: Charles LeTouzey, CVR PCA)

Having a few years of driving this car behind me I felt like I had a decent idea of where I wanted to take the car next.


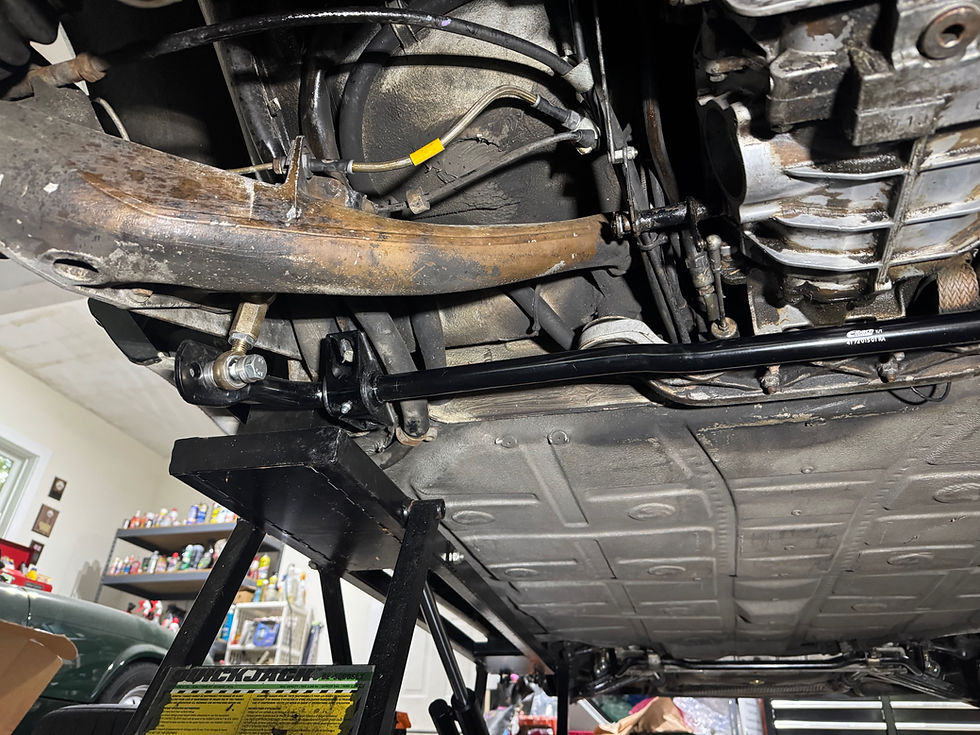
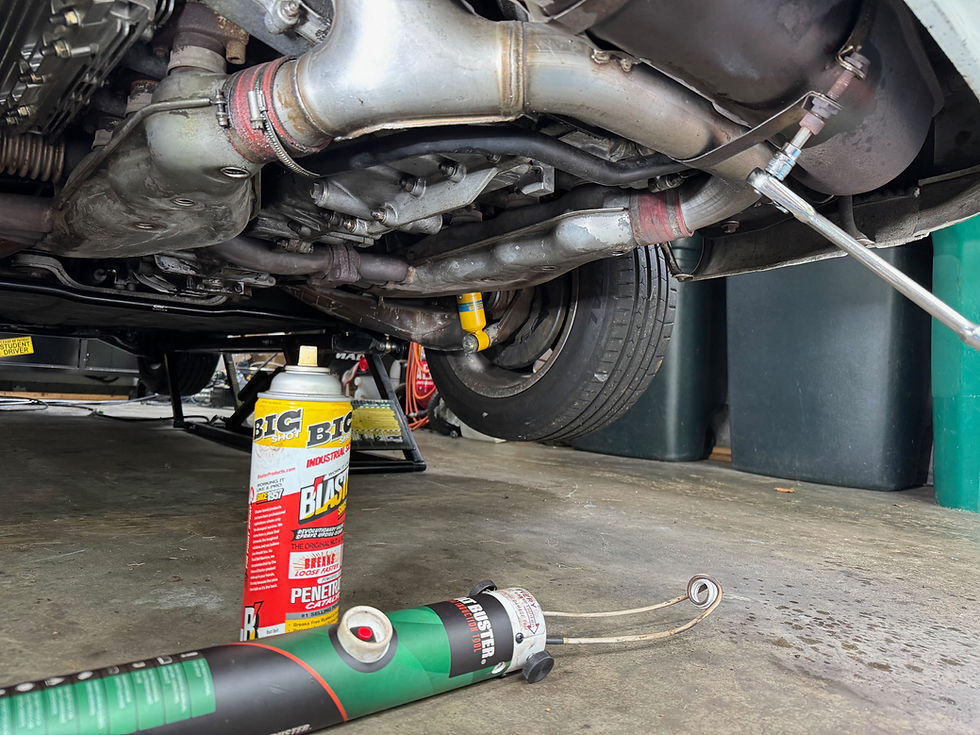
With the front suspension fully refreshed, the car leaned a lot in corners and would lift a front wheel in the air (above). Not a surprise (it leaned when it was all old and tired too!) but I wanted a good baseline before touching anything. I wanted to reduce that tendency and your choices are basically torsion bars or anti-sway bars. (or both, of course). Additionally, when I am ready to corner weight the car, the stock sways make it harder because they have pre-load and would need to be disconnected. Adjustable links are about $300 for each end of the car and a pair of Eibach bars that come with adjustable links is just a little more. $600 for new links on the stock bars or 2 new adjustable bars for $100 more? The math is not tough.


Spring Plate Bushings

Next, the rear of the car felt pretty sluggish, like an abnormal delay in weight transfer. My spring plate bushings were showing signs of serious wear. Making the car easier to adjust in the rear with new adjustable plates is a big plus, and I hoped the new bushings would tighten up how well the rear responds. I dealt with all that HERE The car is enough tighter in the rear now I had to lower the rear air pressure a pound or two to keep the balance I like. It was pretty tail-happy the first time I auto-crossed it after the work. (style points?)


DME & Exhaust Mods

PCA Production class allows for any engine software as well as any exhaust that meets noise rules, so I ordered a Steve Wong chip, a Fabspeed Euro pre-muffler and a Dansk sport muffler (70mm). Together they looked like a low cost way to pick up some HP. The 911Chips site dyno sheet shows an over 20HP improvement over stock on one 3.2 Carrera which is ~ 10%. Every engine is different, but it sure seemed worth a shot to see what I could get here.


Anti-roll bars

The bars are a fairly easy install & Eibach provides very good instructions. The FCP video is quite good as well (the whole series is!) The hardest part is getting the stock front bar out. I used my feet to push one side out first. A real lift would probably help here.

Pro: The Eibach kit is simple to install and the directions are very clear. The kit is also well balanced and I had no real adjustments to make to my driving except getting used to the car changing directions more quickly and leaning a lot less. On the roads it corners flat. I have only tried the middle setting so far.

Con: The only downside is some added roughness over bad pavement which is honestly to be expected.

The new front bar is easier to install and uses stock hardware for the mid section. You do need to add spacers (included) to keep the skid plate from contacting the new bar.
The rear bar uses the stock mounts (mine were already reinforced with ER mounts) and a new bracket.

Installing the 911Chips PROM

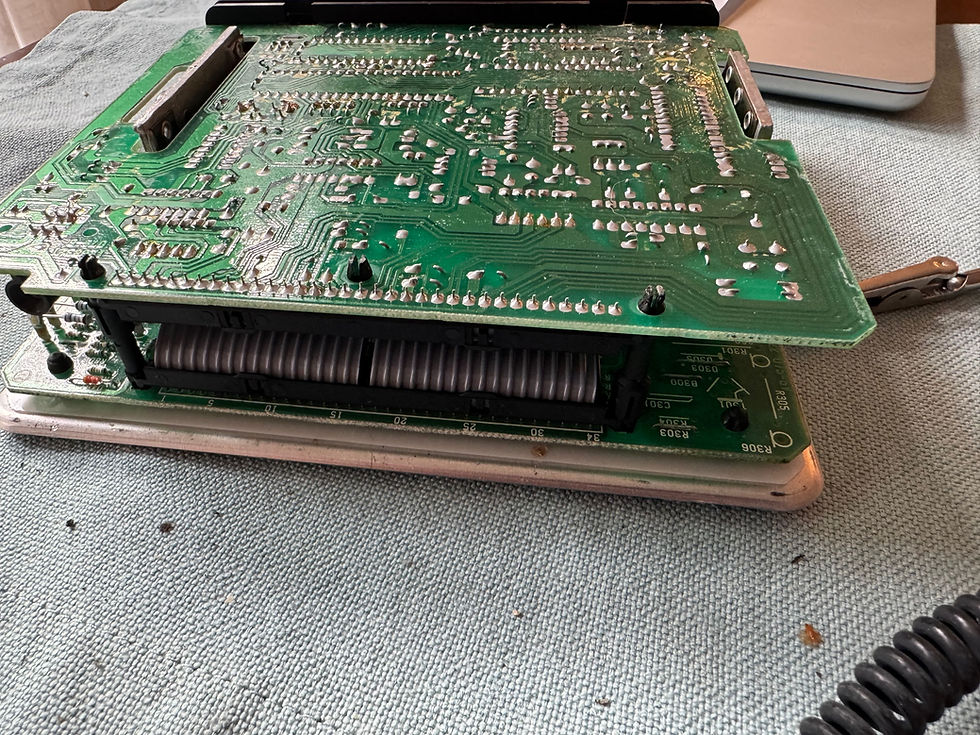
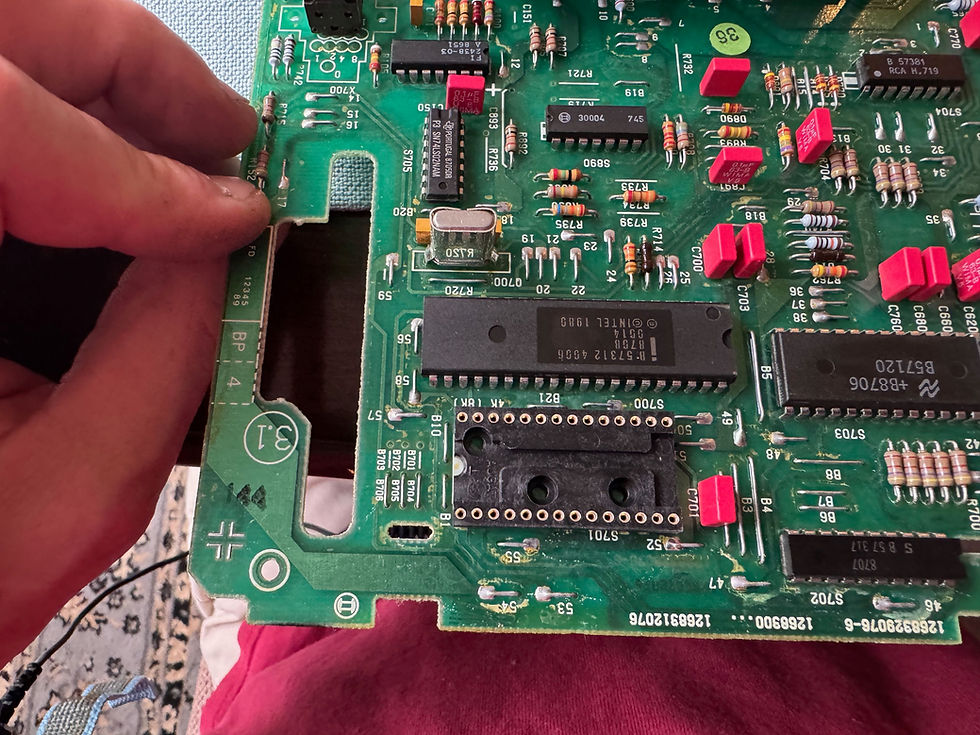
Installing the SW Chip is simple although if you are not familiar with electronics (esp old and brittle boards and connectors) you may want to have someone do it for you.

Basic safety advice: wear a static strap that is grounded. Work on non-static surfaces; here I am on a wooden kitchen table with a cotton placemat. No shag carpet! No chance of static. It does not take much to fry a chip. The directions that come with the chip are very good, I just wanted to add a couple of pics where I thought folks could trip.

Those 6 tabs need to get gently bent up so that the cover can be removed. A small screwdriver is great for bending them up as well as bending them back when you’re done.
When the cover comes off, you have this circuit-board sandwich. The 2 plastic spacers on the ends are what you separate in order to access the PROM chip.
Just insert a small screwdriver here and turn it gently to release the standoff. Be very gentle as you do this as well as when you open up the boards. That ribbon connector could be fragile. Make sure the assembly is at least room temp if you do this in the off-season.
The standoffs release and you can open up the assembly to access the chip (there on the lower board closest to me)
All ICs have a notch to mark their orientation. Here it is that half-moon cutout on the left side. This is how the new chip must go in.  I used a small screwdriver to lever the old chip up slowly, going end to end. You do not want to strain the socket, the chip or those 36 year old solder pads on the back of the circuit board. A vintage Intel 8708 processor(?) crunches the numbers. Have not found much info on it yet.
All ICs have a notch to mark their orientation. Here it is that half-moon cutout on the left side. This is how the new chip must go in. I used a small screwdriver to lever the old chip up slowly, going end to end. You do not want to strain the socket, the chip or those 36 year old solder pads on the back of the circuit board. A vintage Intel 8708 processor(?) crunches the numbers. Have not found much info on it yet.
With the chip out you can see the socket also has the same orientation notch.
The two things with the new chip going in are making sure that all of the pins are properly lined up with their holes and pushing gently and evenly. I like to barely seat one side and then deal with any pins on the other side that may need a nudge. A plastic trim tool or similar can be helpful here. Once all of the pins are in the holes, then you can press down gently and evenly. The magic word here from start to finish is “Gentle”.

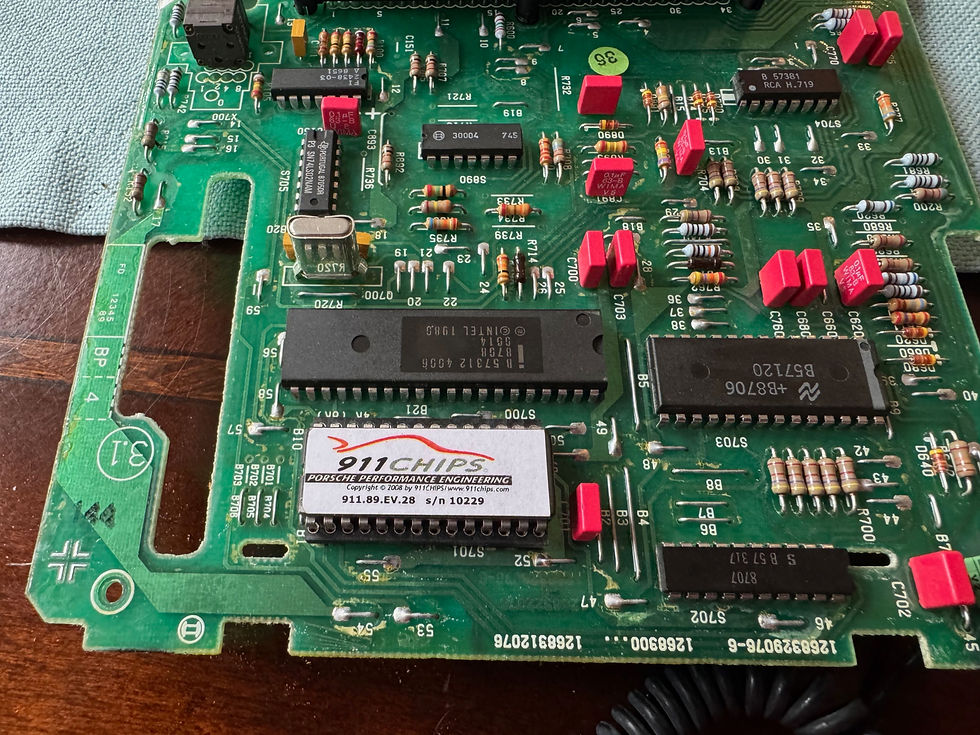
I ordered the chip with settings to expect 91 octane fuel, a euro pre-muffler & sport muffler. Even before the exhaust parts went in the engine was already more responsive and felt much better with the new chip. Much more like carbs & it pulls towards redline like a wild animal now. Previously it felt like when I hit the gas the DME would sit and do math for a while before delivering any power. It felt strong right up to the redline, but not like this.


Pro: It feels more like a carburated engine, much more immediate response to throttle. With the pre-muffler in place the car definitely has more power, it started chirping second during auto-x runs and I can rotate the car much more easily in corners. The response from lower RPM feels far better as well. I'll see if I can schedule a dyno run to try and put some numbers around this.


Con: I am not aware of any. It feels amazing! If I needed to go back to stock it is simple to do. It idles smoothly, starts nicely (maybe even better?) and feels stronger across the board but especially in the low to mid RPM range.


Exhaust Work

The exhaust work took a lot of time thanks to decades of rust & required some real determination. This came in the form of an inductive bolt heater and PBlaster.

Flame aka "the hot wrench" is the tradional fix for stuck fasteners, but I live and work in a wood frame house that is miles from the nearest hydrant. Fire is a no-go - if I can help it.

Inductive bolt heaters work by generating eddy currents in ferrous fasteners. Essentially the resistance to a varying magnetic field heats them to cherry red in about 20 seconds. I would have needed either flames or saws and hammers to get the old fasteners out otherwise. Flames also risk collateral damage in the car; the bolt heater is precise. Only the thing inside the loop at the end gets hot.

The exhaust system is held in by 6 bolts here at the manifolds, and 3 more at the muffler. They were all very rusty and facing the wrong way to let me tap them out.
My best friends for this work, penetrating oil and the bolt heater. I sprayed them first, let them sit over night. Tried them the next day and if they wouldn’t budge I heated them to red-hot and sprayed them again. This was usually enough although some fasteners needed 2 or 3 rounds of this treatment (heat up and spray).  Wear good gloves because your wrench will get hot.
My best friends for this work, penetrating oil and the bolt heater. I sprayed them first, let them sit over night. Tried them the next day and if they wouldn’t budge I heated them to red-hot and sprayed them again. This was usually enough although some fasteners needed 2 or 3 rounds of this treatment (heat up and spray). Wear good gloves because your wrench will get hot.
The cat came off, finally, but I could not get the O2 sensor out. So I just bought a new one and installed that in the    Fabspeed pre-muffler.  If I pop the Cat back in, it just makes things that much easier. S-wrenches are helpful here.
The cat came off, finally, but I could not get the O2 sensor out. So I just bought a new one and installed that in the Fabspeed pre-muffler. If I pop the Cat back in, it just makes things that much easier. S-wrenches are helpful here.
Test fitting the new pre-muffler. The exhaust hardware kit I bought had bolts that were too short (30mm rather than 40mm - I did notify the mfr) so I ordered some stainless ones from Bolt Depot. I mounted them with the nuts toward the outside so I could tap them out in the future if needed and used hi-temp copper neversieze on them. The Fabspeed pre-muffler fit perfectly in place of the Cat and is beautifully made. I wound up bolting it in with the stock muffler at first just to see what that was like. The noise level really didn’t change but I really felt the benefit of the DME + breathing changes. The pre-muffler is essentially a straight pipe with a resonator around the outer surface which cuts down on harsh higher frequency sounds. The sound you do hear is glorious with more of that good 6-cylinder growl.
The stock muffler is held in by these 2 straps and the 3 bolts that connect to the pre-muffler or cat. There are cutaways on the muffler body to help locate the straps and it can’t fall on your head - you have to slide it in (or out) from the left side, and then the hot air pipe and bumper keep it from falling. Very thoughtful.
My old straps were very rusty and I had to use several rounds of heat & oil as well as counter-hold the nut so that the strap wouldn’t just twist.
One of the least expensive sport mufflers, 1-in, 1-out in “aluminized" steel. This one has a 70mm polished tip.
Here the new muffler is in place and nearly all tightened up.  The left side strap was tough to get around everything and I needed to use a zip-tie to pull it together and then pliers to go the rest of the way so I could start the bolt. It’s always something!
Here the new muffler is in place and nearly all tightened up. The left side strap was tough to get around everything and I needed to use a zip-tie to pull it together and then pliers to go the rest of the way so I could start the bolt. It’s always something!

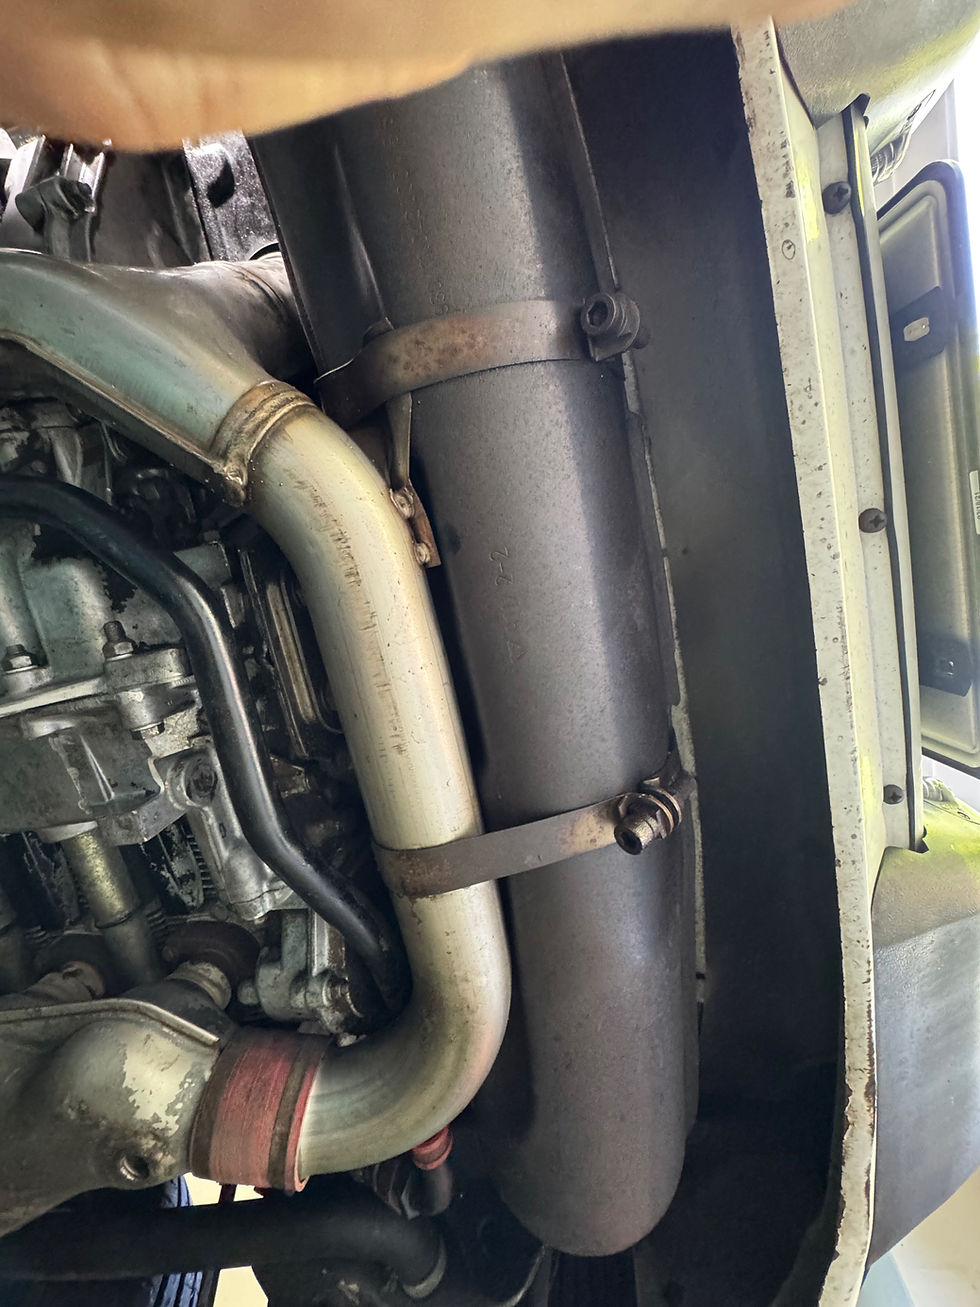
Pros: It all fits perfectly, is priced well, seems very well made and sounds glorious. It is certainly louder than stock but not unreasonable at all. It's feels like it's on par with the stock exhausts on some current day muscle cars. You can have a conversation in the car without yelling and unless you wind it out in your driveway I doubt the neighbors will really care. It is pretty simple to put the cat back in when the track season is over. You do also save a few pounds with the pre-muffler.


Cons: With the cat out the exhaust smells a bit more, like an older car. The O2 sensor still makes sure your mixture is good. Longer term I will probably want to find a good high-flow cat so I can have the best of both worlds.

The sport muffler is louder and has a nice burble to it, but it's not obtrusive & I didn't hear any droning at various engine speeds or highway cruising.

Conclusion: You will want to wind it out on entrance ramps & rev it under every bridge. And you should.


Empirical Results

I found a lot of posts referencing people's butt dynos out there. Nothing wrong with that I guess, but I like something a bit more concrete. To that end I was able to get the car up on a dyno at a cool local shop (link below) for a few runs. Here is what that looked (and sounded!) like:

ree

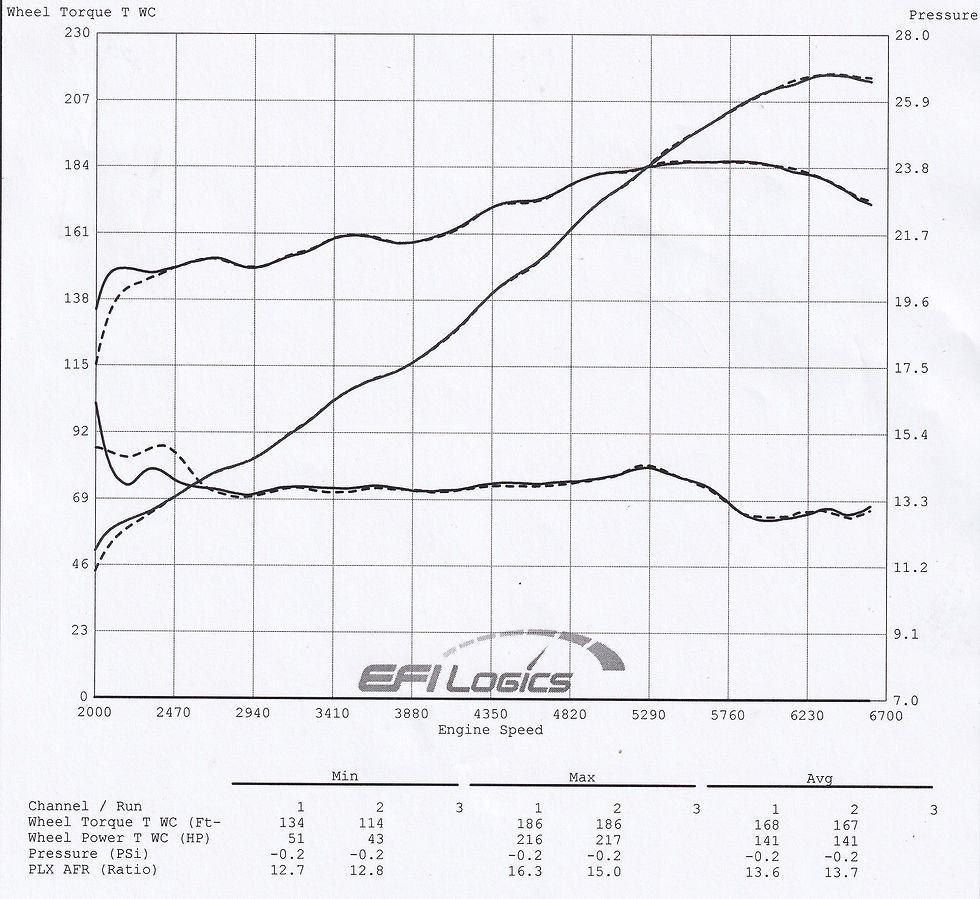
Ambient temp was 70 F. They tossed the first run because the exhaust was still heating up. I took a nice 40min cruise ahead of the test, but just parking for 15 min threw off the results. The next two were nearly identical and what show on the printout above.


The engine has ~134,000mi on it, and pretty bad exhaust valve guides in cyl 1 & 2. I have not yet done a leak down test though (will add those results once I do)


Even so, the chip & exhaust work yielded 217 HP at the wheels (249 at the crank) and 186 ft/lb (213 at the crank) which is roughly 15% over stock. This was significantly better than I expected, and seems in-line with what my right foot was telling me. Pretty good bargain for <$2k and not having to crack the case. I'll need both compression and leakdown to confirm this, but I suspect my pistons and rings are in good shape and I should get away with a top end rebuild this winter.


Here is what the thing sounds like winding out to ~6,600 rpm now. (per the display in the upper LH corner) :

Unlike most cars, you don’t need to set up big fans and open up the engine bay to keep an air-cooled 911 cool during dyno testing. Just strap it down and go. I installed rear tie downs from Rennline to make set up that much easier. They mount on the lower shock bolt.

Resources:


Additional Info:

FCP Install video for Eibach Sways: FCP install video: duck://player/GUC9TtxiE7s

EFI Logics (race car prep & custom tuning): https://efilogics.com/


Special thanks to Ben & crew for letting me sneak in during a very busy end-of-season rush!


Comments

Rated 0 out of 5 stars.
No ratings yet

Add a rating
Post: Blog2_Post
bottom of page